Friday, April 27, 2012

Lady Bug Booties Pattern


Lady Bug Booties Pattern:


I used a J 6.00 mm hook and a G 4.25 mm (for the eyes)

Rnd 1:  with black ch2, sc 6 in 2nd ch from hook, join
Rnd 2:  ch1, sc2 in each stitch around, join
Rnd 3-6:  ch1, sc in each stitch around, join
Rnd 7:  Change color to red, ch 1, sc in each stitch around...  DO NOT JOIN!  (this is very important... this starts the opening for the booties)... do not join, instead turn.
Rnd 8:  ch 1, sc in each stitch, turn
Rnd 9-12:  ch 1, sc in each stitch, turn

finishing edge around the top of bootie:  sc evenly around opening making sure to sc in the space where the black meets red...  when you reach the back of the bootie, sl st both sides of shoe together, or if you prefer to sew it so that it looks more seemless, that is entirely up to you. 

fasten off and weave in ends

Antennas:  with black ch 6, sc in the spot in the middle where the black meets the red... but on a black stitch...  (I hope that makes sense)  ch 6 more and tie off...  Then knot the ends of your antennas so that it looks like a small ball shape at the end of the antennas... then cut off excess yarn.

Eyes:   (Make 4)  Use a G hook...  ch 2, then sc 5 in 2nd chain from hook, join fasten off.  Then sew on lil black buttons and sew to the booties... or if you prefer, you could just sew the eyes on with black yarn, sewing from the center of the eye.

I believe that this pattern could easily be used to make adult size slippers as well...  I would think that you could use a bigger hook, like the N hook, and make more stitches in the beginning, like instead of only 6 sc, maybe 12 or more... and then instead of just 6 rounds of each color... then I would measure the foot and crochet the black till it was half the length needed and then start on the red and crochet the same amount of rows as the black.  I am definitely not an expert and I haven't yet tried it out for adult size slippers.  This is just an idea that I had.  Let me know if you do try it out for adult size slippers.

If anything is unclear please contact me or leave a comment below!

Enjoy!  

Thursday, April 26, 2012

My plarn bag pattern

     A couple weeks ago I ordered some PLARN from a new friend that I met in one of the crochet groups that I am in on FB.  I was excited about making something with it, but then you know how it goes... I got distracted!  So today I decided to do something with it.  I knew I wanted to make a bag.  I have seen some of the teenage girls at my church carrying small bags made with this same material, so this is what I came up with!  It isn't a huge bag... It is only about 10 inches wide at it's widest point on the bottom and 7 inches tall, not counting the handles... so perfect for a teenager who doesn't carry tons of mom stuff like I do... or your lil girl... Or even just on those days when you just don't want to lug around all that mom stuff!
     So after getting so many compliments on the bag, I have decided to share the pattern.  And if you are a good crocheter, I'm sure you can figure out how to make it bigger if that is what floats your boat!

I just want to say... this one was made with Plarn... but I'm sure it can be made with any worsted weight yarn of your choice.

OK so here goes... I hope this makes sense to you all... If not please feel free to email me at jamiegaspar4@yahoo.com... or leave a comment below.  I am more than willing to help you!


Cutie Patootie Plarn purse Pattern

I used a K hook

Ch 26, hdc in 2nd chain from hook and each ch across till you reach the last chain, then crochet 3 hdc in the last chain.  Do NOT Turn...  Work 1 hdc in each chain on the other side of beginning chain till you reach the first chain, then crochet 2 hdc in that chain for a total of 3 hdc in that first chain...  Work in a continuous round till you reach 11 rows or the height of your choice.

 This is when I chose to change colors.  Change colors 3 stitches past the edge of the bag, and hdc all the way around this round.  Next is the pleat row.  Hdc in the next 4 stitches,  (Skip 3 stitches and yarn over and insert hook from back to front around the 4th hdc, pull up a loop and insert hook from front to back around the first skipped hdc, yarn over and pull through all 3 loops on hook-  This will make the pleat.  Make sure you pull that pleat stitch tight otherwise it won't be noticeable)  hdc in next 2 stitches, skip 3 stitches and make the pleat again, hdc in next 2 stitches, skip 3 stitches and make pleat again for a total of 3 pleats on front side, hdc in next 14 stitches, skip 3 stitches and make pleat again, hdc in next 2 stitches, skip 3 stitches and make pleat again, hdc in next 2 stitches, skip 3 stitches and make pleat again for a total of 3 pleats on back side, hdc in next 7 stitches,

Then hdc all the way around the next round

The next row hdc in back loops all the way around the next round

The last round before the handles:  sc all the way around the last round...  DON'T fasten off yet.

Handles:
 Front:  ch 2, dc in next 3, turn, ch 2, dc in next 3, turn....  repeat this for the handle until you have 18 rows... or the length you would like for your handles.  fasten off after last row of dc for handle and leave a tail for sewing...  Sew the other side of the handle to the front of your bag  about 4 stitches before the left edge of bag.
Back: sl st on back of bag directly behind the handle you just finished on front, ch 2, dc in next 3, turn... and repeat like front handle...  then sew onto the bag like you did for the other side.  Now you could just leave it as is, but I decided that I wanted to put a sort of a border around one side of the handles, so you could sl st in one corner of the outside of the handles and sc with the contrasting color around the side edges of the bag and around the handles, then finish off and weave in ends

The flower:  Puff stitch flower

I used this pattern, but instead of using the smaller hook that they used I continued using the K hook and also instead of sc 12 into the circle, I hdc 12... just so that it comes out a bit bigger... but that is totally up to you how you want your flower to be!  So then I just sewed on my flower... weaved in any ends... and then glued on some different sized pearls in my colors.  I do suggest using a contrasting color for your flower, just for the effect!  Also if your pearls allow you, it is better to sew them on.  If you are as hard on bags as I am, they may fall off after time with only glue, but once again... totally up to you!  Enjoy... and I hope this pattern makes sense... if not feel free to ask me.  This is only the 2nd pattern I have written out:)


Wednesday, April 25, 2012

Frog Camera Lens Friend free pattern


My Frog camera lens friend
free pattern


I used a K hook

Body: Rnd 1.Using a rubber band or hair tie... (I don't have an exact measurement for the rubber band, but it was the average size for pony tails)... sc 60 (or enough to cover your rubber band completely) around the rubber band... sl st to beginning sc
           Rnd 2. ch 2, dc in each stitch around, sl st in top of ch 2 at beginning... fasten off... weave in ends 


Legs: (Make 2) Ch 10, turn and sc in 2nd ch from hook and each ch across... ch 5, sl st in last st, ch 5, sl st in last st again, ch 5, sl st in last chain again for a total of 3 toes... fasten off... weave in ends 


Arms: (Make 2) Ch 7, turn and sc in 2nd ch from hook and each ch across... ch 4, sl st in last st, ch 4, sl st in last st again, ch 4, sl st in last chain again for a total of 3 fingers on hand... fasten off... weave in ends 


Eyes: (Make 2) Ch 4 and join to make a circle... hdc 6 in circle, sl st to join to first hdc
          Rnd 2. Ch 2, dc in same st as ch 2, dc 2 in each stitch around circle, sl st to join with first st...fasten off.. weave in ends 


Finishing: Sew buttons or glue on googly eyes on the eyes and sew eyes to the top of the frog body... sew on arms and legs where you think they should go. 


Sorry if I didn't write out the pattern correctly. It was my first attempt. Let me know if something isn't clear:) Enjoy!

Thursday, March 29, 2012

Here I am posting yet another blog today!  Just wanted to share with you all the new plan that me and my children have made.  Since we are LOVING pinterest too much... we have made a goal to try to make 1 thing a day from all the great ideas that I have pinned on my pinterest pinboards.  I know that some days may be difficult to get that done, but the main goal is to do at least 4 a week!  So the blog will be all about achieving our goal and showing off what we did and how we did it... So if you are willing to join us.. then don't miss the blogs!  Let's Start Tomorrow!
Yes! I am very new at blogging... but I am starting to like it... so hopefully very soon I will be trying to do a tutorial too! Let's see what comes to me in this next week or so before Easter! Hopefully I will get creative... At least you will see my girls Easter dresses. They have to be done this next week for sure! But until then... just wanted to share this pic of my version of the DIY storage box... which once was a diaper box... Good old Target Up & Up diapers... which we loved by the way, but glad to say we are done with diapers... FOREVER!

More Hobbies


Some of you who know me already know that at Christmas and New Years I was in the hospital for a week and had to chill out for a while... but I have decided to get back to my hobbies!  In case you don't already know what my hobbies are, I will let you in on it!  My first hobby that I started on when I was just a kid was crocheting... My grandma taught me when I was about 10 I believe.  But of course that got put aside when it wasn't "IN"....  So later I decided to start arranging flowers and making lil party decor thingys or centerpieces I guess I should say... which later led to Wedding Decor, which later led to balloon decor, (Which I love to do btw), and then cake decorating.  It turned out that me and my hubby together could take care of a wedding or quinceanera completely on our own.  My hubby is a caterer and he loves to take pics and video and then edit videos... and then of course I love decorating the special occasions and decorating the cake... so really we could do the whole event... even music if you like Mexican Christian Rondalla music!  But my most recent hobbies would be jewelry making which I started about 2 years ago... and then hair pretties, which I still do off and on for my girls or special orders... and then of course I'm sure you know that crochet is really "in" nowadays, so I am doin that as well.  And just recently I was given an awesome sewing machine, which I do know how to use to an extent.  So needless to say, I am really into sewing for my girls these days.  I am thinking that I will be offering a few lil skirts or photo props over at Jamie's Jems on FB very soon!
     I feel like showin off some pics of things that I have made or done with all of my hobbies... Enjoy the pics!


Recent sewing projects... This dress was made without a pattern... First time I ever even tried to do that!

Here are some of my crocheted items that I have made:


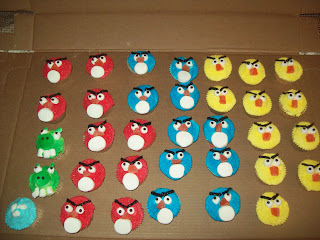
Now how about some cakes:


Here are some party decor pics as well:


You wanna see some jewelry?


And maybe a few hair pretties!


Have I inspired you yet?

Oh and what about my first attempt at making a tutu?  Here it is!


If this wasn't enough to inspire you to find your hobby, then I suggest you join Pinterest...  That's where I get all my inspiration!  Look me up when you get over there...  (Jamie Hansens Gaspar)